I’ve been asked several times if I could make some tutorials about how I created my pictures. A poll on my deviant Art account showed the same. So I decided to create a first tutorial about how to create a perfect depth of field (DOF) in your renders in DAZ Studio.
As I work with DAZ Studio 4, Reality and Luxrender I will use these tools during the tutorial as well.
If you use another render engine than Reality and Luxrender, that’s not a problem. The steps in DAZ Studio remain the same.
But first of all let’s see, what wikipedia says about the depth of field:
In optics, particularly as it relates to film and photography, depth of field (DOF) is the distance between the nearest and farthest objects in a scene that appear acceptably sharp in an image. Although a lens can precisely focus at only one distance at a time, the decrease in sharpness is gradual on each side of the focused distance, so that within the DOF, the unsharpness is imperceptible under normal viewing conditions.
That means with traditional cameras and lenses there will never be the complete picture perfectly sharp. Many photographers use this as a stylistic device to separate the main subject from the background.
And that’s exactly what I try to do in my pictures as well.
You can often read the following receipt when it comes to creating a depth of field with DAZ Studio and Reality:
- Create a null object at the point where you want to focus to
- Use the function of Reality to focus at exactly this point
It’s of course an easy method, but I like to have a little bit more control! DAZ Studio is giving us some great tools to define the depth of fields, so let’s use these tools.
First of all we need a camera for the scene. I usually create one for the scene which I don’t change afterwards while working on the poses of my models.
If we want a really blurry background we should use an aperture (f/stop) between 1.4 and about 4 and a long focal length.
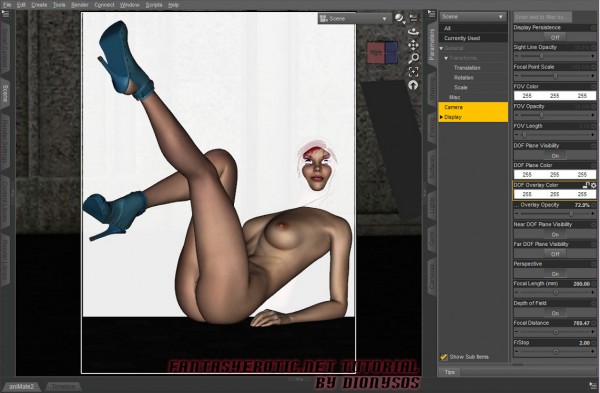
As you can see my camera is called “Scene” and I have chosen a focal length of 200mm and a f/stop of 2.0. To adjust the depth of field I select the Camera and Display in the Parameters Tab.
It’s important that Depth of Field is set to On and the DOF Plane Visibility is also set to On. Otherwise you won’t see the effect.
Within the Display parameters you can enable the Near DOF Plane Visibility and the Far DOF Plane Visibility.
I usually start with the Near DOF Plane and move it using the Focal Distance slider. My goal is to put it right before the eyes. That means that everything which is closer to camera than this plane (and the eyes of my model) will be out of focus.
After that I switch to the Far DOF Plane to see how far the sharp area in my picture will reach. As expected it is not very much, but that’s actually exactly what we want. Everything which is behind the Far DOF Plane will be out of focus.
The area between the Near DOF Plane and the Far DOF Plane is the area which is sharp. If the area is to small you can increase the f/stop to a higher value e.g. 8 or 16 to get a larger area which is in focus.
If you have adjusted the DOF Plane as you want it you can call Reality.
All you have to do here, is to go to the camera tab enable DOF and choose the same f/stop as you have set in DAZ Studio. The focal distance is automatically set to the value from Studio.
That’s all! Now you can create beautiful renders with a nice depth of field.
Have fun and if you have questions about this, just use the comments to ask.
Oh, before I forget it, the finally picture looks like this. You can see that the floor before and behind our beautiful young woman is blurry as we expected it.

It’s a first picture from a series “Girls with Shoes” I am working on.


This is very helpful! I am attempting to do some pin up girls in DAZ dressed and posed like the pin up girls painted on WWII bombers.
Love your tutorial! Thank you!
Will you be posting more tutorials, as I am re-discovering Poser and DAZ again, and seem to find myself consumed with a quest for knowledge and tutorials…
Thanks!
P.S. great Deviant Art page too!
Rebecca
Thanks! I’m glad that you like it. It’s quiet possible that I’ll do more tutorials in the future.
Any certain wishes?